Table of Contents
Lunch Box Mini Quiches
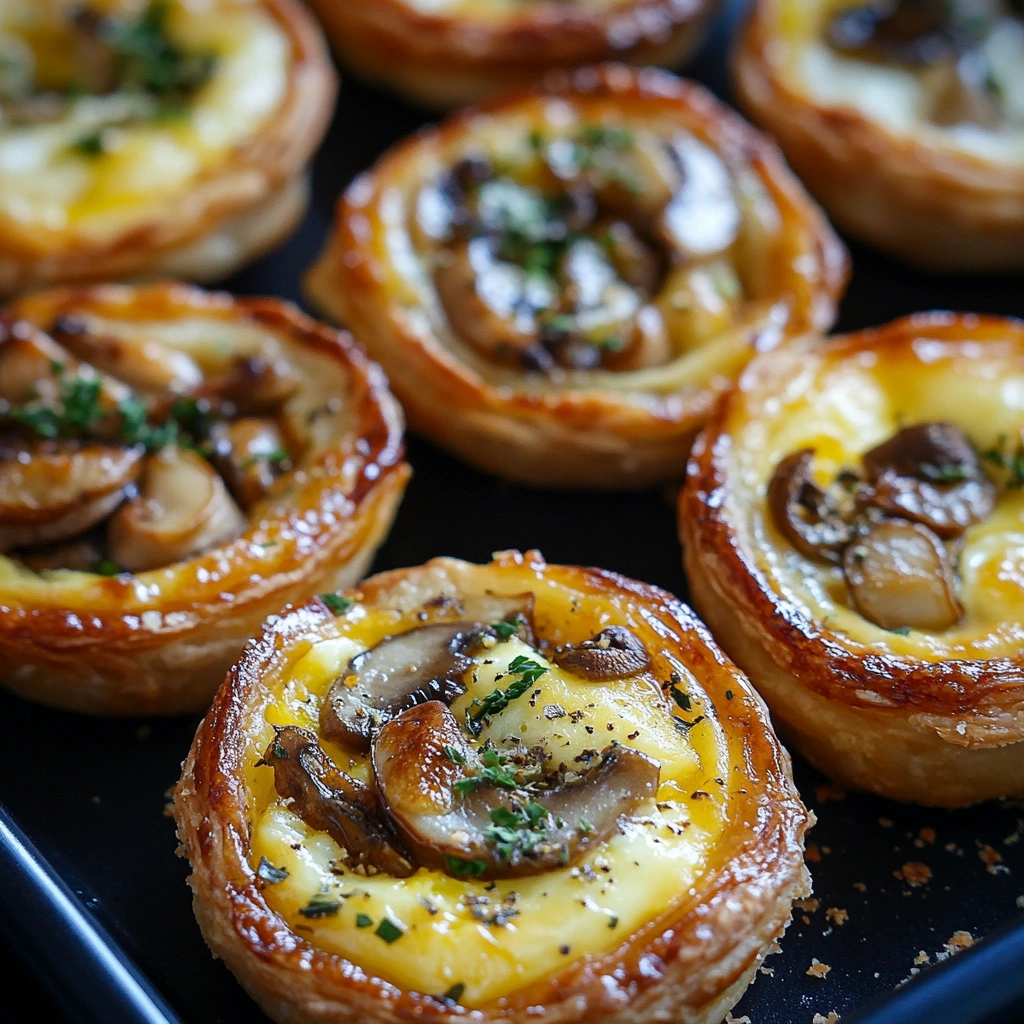
These mini quiches are perfect for busy parents! They’re simple to make and kids love them. No more wondering what to pack for lunch – these little egg cups solve that problem.
Picture fluffy eggs in pastry cups with cheese and vegetables. They taste great and are just the right size for kids to hold. You can eat them warm or cold, which makes them perfect for lunch boxes. The best part? You can add whatever ingredients your kids like.
These mini quiches are made for busy families. They’re small enough for little hands, don’t make a mess, and travel well in lunch boxes. They look fancy but are actually really easy to make during weekend meal prep.
What makes these mini quiches truly special is how they solve so many parenting problems at once. Need a protein-packed breakfast that kids can eat on the school bus? Check. Want a lunch that won’t get soggy or fall apart? Double check. Looking for a snack that’s actually nutritious but tastes like a treat? Triple check! These little wonders are about to become your most treasured recipe.
Why You’ll Love These Mini Quiches
- Easy meal prep – Make them on Sunday for the whole week
- Kids love them – Tasty and fun to eat
- Great nutrition – Sneak vegetables into every bite
- Perfect for lunch boxes – No heating needed, no mess
- Use what you have – Add any ingredients you like
- Save money – Uses simple, cheap ingredients
- Freezer friendly – Make extra and freeze for later
- Whole family approved – Great for kids and adults
Everything You Need for Mini Quiche Magic (Makes 24 mini quiches)
For the Easy Pastry Cups:
- 2 packages (14.1 oz each) refrigerated pie crusts (or homemade if you’re feeling fancy)
- Cooking spray or butter for greasing
For the Fluffy Egg Filling:
- 8 large eggs
- 1/2 cup whole milk
- 1/4 cup heavy cream
- 1 teaspoon salt
- 1/2 teaspoon black pepper
- 1/4 teaspoon garlic powder
- 1/4 teaspoon onion powder
For the Delicious Mix-Ins (choose your favorites):
- 1 cup shredded cheese (cheddar, Swiss, or mozzarella work great)
- 1/2 cup cooked bacon bits or diced ham
- 1/2 cup finely diced bell peppers
- 1/4 cup finely chopped green onions
- 1/2 cup fresh spinach, chopped
- 1/4 cup sun-dried tomatoes, chopped
Optional Garnishes:
- Fresh chives or parsley
- Cherry tomato halves
- Extra shredded cheese for topping
How to Make Mini Quiches
Step 1: Get Ready Heat oven to 375°F. Spray 2 muffin tins with cooking spray.
Step 2: Make Pastry Cups Roll out pie crusts. Cut circles and press into muffin cups.
Step 3: Pre-Bake Bake empty pastry cups for 8-10 minutes until lightly golden.
Step 4: Mix Eggs Whisk together eggs, milk, cream, salt, pepper, garlic powder, and onion powder.
Step 5: Add Fillings Put your chosen ingredients (cheese, vegetables, meat) into each pastry cup.
Step 6: Bake Pour egg mixture into cups. Bake 18-22 minutes until centers are set and tops are golden.
Step 7: Cool and Serve Let cool for 5 minutes before removing from pan.
Serving Suggestions That’ll Make Every Meal Special
These mini quiches are incredibly versatile and work beautifully in so many different situations. For lunch boxes, pack them alongside fresh fruit, veggie sticks with ranch dip, and maybe a small treat. They provide the protein and staying power kids need to get through their afternoon without that dreaded energy crash.
For breakfast, serve them warm with a side of fresh berries and a glass of orange juice. They’re sophisticated enough for a weekend brunch but simple enough for busy school mornings. Pop them in the microwave for 30 seconds if you want them warm, or enjoy them at room temperature.
These mini quiches also make fantastic appetizers for adult gatherings. Arrange them on a beautiful platter with some fresh herbs as garnish, and watch them disappear! They’re elegant enough for baby showers, book clubs, or holiday parties, but casual enough for game day snacks.
For dinner, serve them alongside a fresh salad and some crusty bread for a light but satisfying meal. They’re perfect for those nights when you want something comforting but not too heavy.
Recipe Variations and Substitutions to Make Them Your Own
Veggie-Packed Versions: Load these mini quiches with vegetables for extra nutrition. Try combinations like broccoli and cheddar, mushroom and Swiss, or zucchini and tomato. Just make sure to cook any vegetables that release moisture (like mushrooms or zucchini) before adding them to prevent watery quiches.
Meat Lover’s Paradise: For heartier appetites, try combinations like bacon and cheddar, ham and Swiss, or even leftover rotisserie chicken with herbs. Cooked sausage crumbles also work beautifully and add great flavor.
International Flavor Adventures: Give your mini quiches a global twist! Try Mediterranean versions with feta, olives, and sun-dried tomatoes, or Mexican-inspired ones with pepper jack cheese, diced jalapeños, and cilantro. Italian versions with basil, mozzarella, and cherry tomatoes are absolutely divine.
Dietary Modification Magic: For gluten-free versions, use your favorite gluten-free pie crust or skip the crust entirely for crustless mini quiches. For dairy-free options, substitute the milk and cream with unsweetened almond milk and use dairy-free cheese alternatives.
Seasonal Specialties: Take advantage of seasonal ingredients! Spring versions with asparagus and fresh herbs, summer ones with zucchini and fresh basil, fall versions with roasted butternut squash and sage, or winter combinations with caramelized onions and gruyere cheese.
Simple Tips for Success
Easy Pastry: Don’t worry if the dough tears – just patch it up with your fingers.
Prevent Soggy Bottoms: Always pre-bake the pastry cups first.
Room Temperature Eggs: They mix better and create smoother filling.
Don’t Overfill: Fill cups only 3/4 full so they don’t overflow.
Storage: Keep in the fridge for up to 5 days or freeze for 3 months.
Reheating: Microwave for 20-30 seconds or eat them cold.

Frequently Asked Questions About Mini Quiches
Q: Can I make these mini quiches ahead of time for meal prep? A: Absolutely! These are perfect for meal prep. You can make them up to 5 days ahead and store them in the refrigerator. They’re designed to taste great both warm and cold, making them ideal for grab-and-go breakfasts and lunches. You can also freeze them for up to 3 months.
Q: Do I need to use a muffin tin, or can I use other pans? A: While a standard 12-cup muffin tin works best, you can also use mini muffin tins for bite-sized appetizers (reduce baking time to 12-15 minutes) or even a regular 9-inch pie pan for one large quiche (increase baking time to 35-40 minutes).
Q: Can I make these without the pastry crust for a healthier version? A: Yes! Simply skip the pastry step and spray your muffin cups really well with cooking spray. Pour the egg mixture and fillings directly into the cups. These crustless versions are lower in carbs and still absolutely delicious. They may stick a bit more, so be extra generous with the cooking spray.
Q: How do I prevent the mini quiches from getting soggy bottoms? A: The key is pre-baking the pastry cups for 8-10 minutes before adding the filling. Also, make sure any vegetables you’re using are properly cooked and drained of excess moisture. Don’t skip the pre-baking step – it makes all the difference!
Q: What’s the best way to reheat leftover mini quiches? A: For the best texture, reheat them in a 350°F oven for 5-8 minutes. If you’re in a hurry, the microwave works too – just heat for 20-30 seconds. They’re also delicious eaten cold straight from the fridge, especially for lunch boxes.
Q: Can I substitute different types of milk or cream in the recipe? A: Yes! While whole milk and heavy cream create the richest, creamiest texture, you can use what you have on hand. Half-and-half works well, or you can use all milk. For lighter versions, 2% milk works, though the texture will be slightly less rich. For dairy-free options, unsweetened almond or oat milk work well.
Q: How do I know when the mini quiches are perfectly cooked? A: They’re done when the centers are set and no longer jiggly when you gently shake the pan. A toothpick inserted in the center should come out clean or with just a few moist crumbs. The tops should be lightly golden brown. Don’t overbake, or they’ll become rubbery.
Q: Can kids help make these mini quiches? A: Absolutely! This is a great recipe for getting kids involved in the kitchen. They can help press the dough into muffin cups, crack eggs (with supervision), add fillings to each cup, and choose their favorite ingredient combinations. It’s a fun way to get them excited about eating what they helped create.
The Perfect Ending: Why These Mini Quiches Will Transform Your Family’s Meals
There’s something truly magical about a recipe that solves multiple problems while bringing joy to your family’s table, and these lunch box mini quiches do exactly that. They’re the answer to so many daily challenges we face as parents – the morning rush, the lunch box dilemma, the after-school snack attack, and even the “what’s for a quick dinner?” panic.
What I absolutely love about this recipe is how it proves that feeding your family well doesn’t have to be complicated or time-consuming. With just a few simple ingredients and one afternoon of prep, you can create weeks’ worth of nutritious, delicious meals that your kids will actually be excited to eat. That’s not just meal prep – that’s parenting magic!
These mini quiches represent everything we want in family food: they’re nutritious without being obvious about it, delicious enough to satisfy everyone, convenient enough to fit into our crazy schedules, and versatile enough to keep things interesting. Plus, there’s something so satisfying about pulling a batch of these golden beauties out of the oven, knowing you’ve just made your life significantly easier for the week ahead.
The best part? Watching your kids’ faces light up when they see these in their lunch boxes, or hearing them ask for “those egg muffins” for breakfast. Food is love, and these mini quiches are a delicious way to show your family how much you care about them, even when you’re not there to see them enjoy every bite.
So preheat that oven, gather your ingredients, and get ready to become the meal prep hero your family never knew they needed. These mini quiches aren’t just food – they’re your secret weapon for easier mornings, happier lunch boxes, and the kind of family meals that create lasting memories.
Here’s to less stress in the kitchen, more smiles at the table, and the joy of knowing that good food made with love can make any day a little bit better!