Introduction
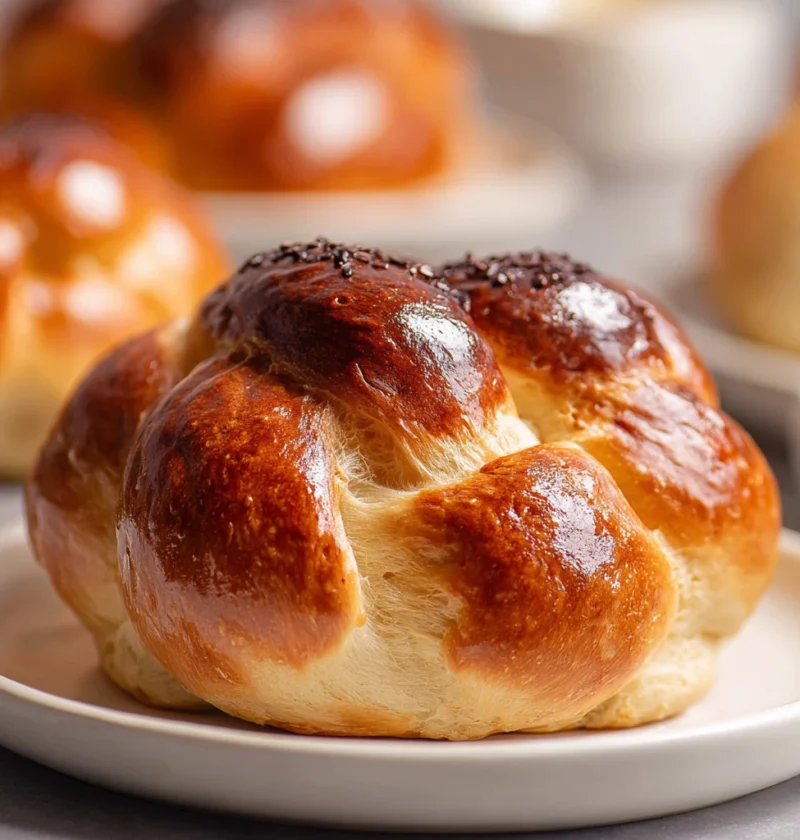
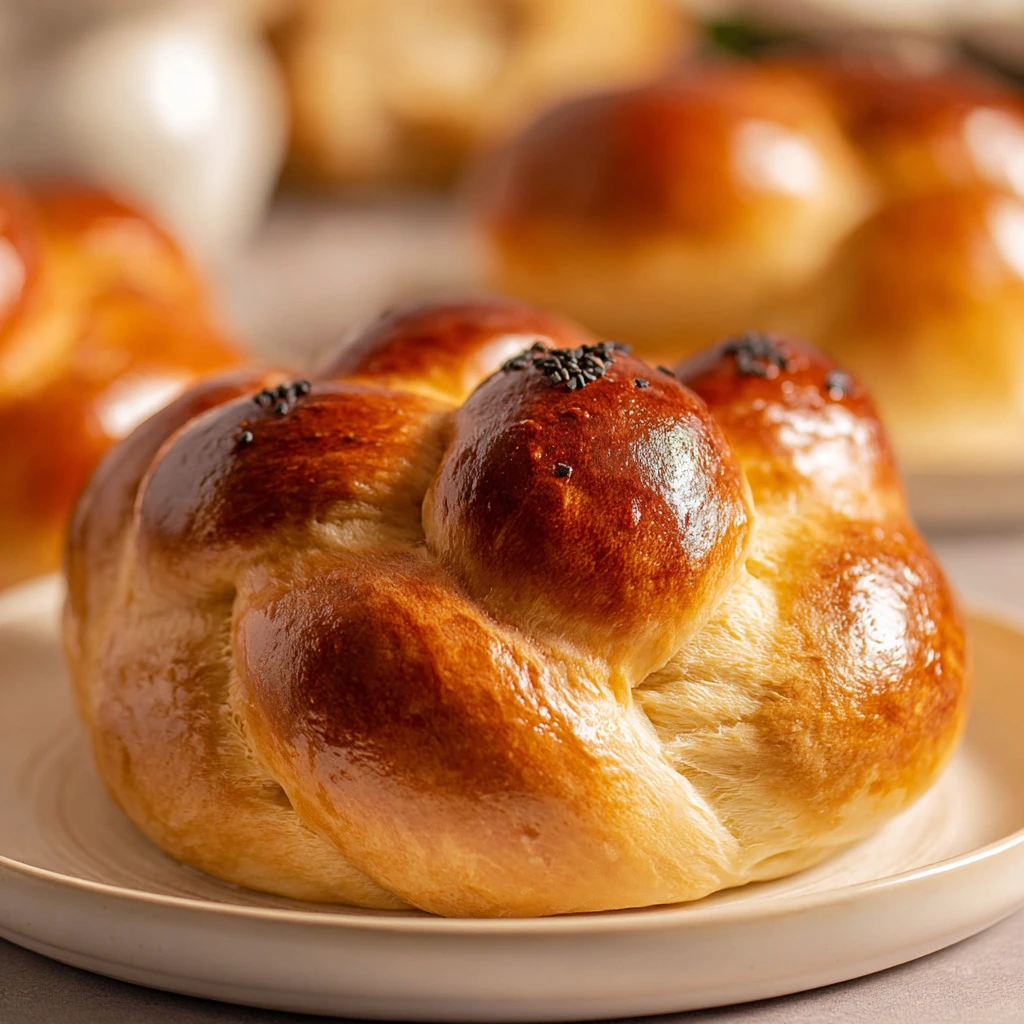
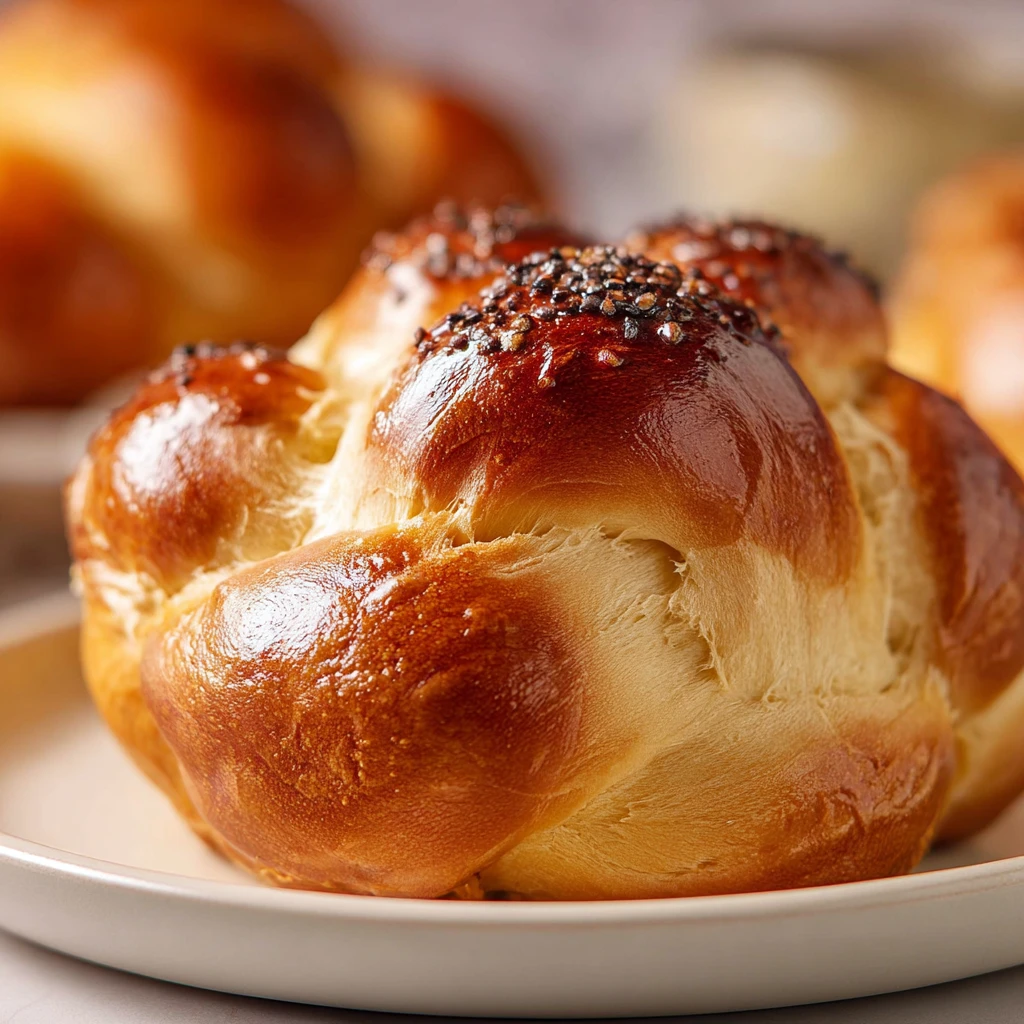
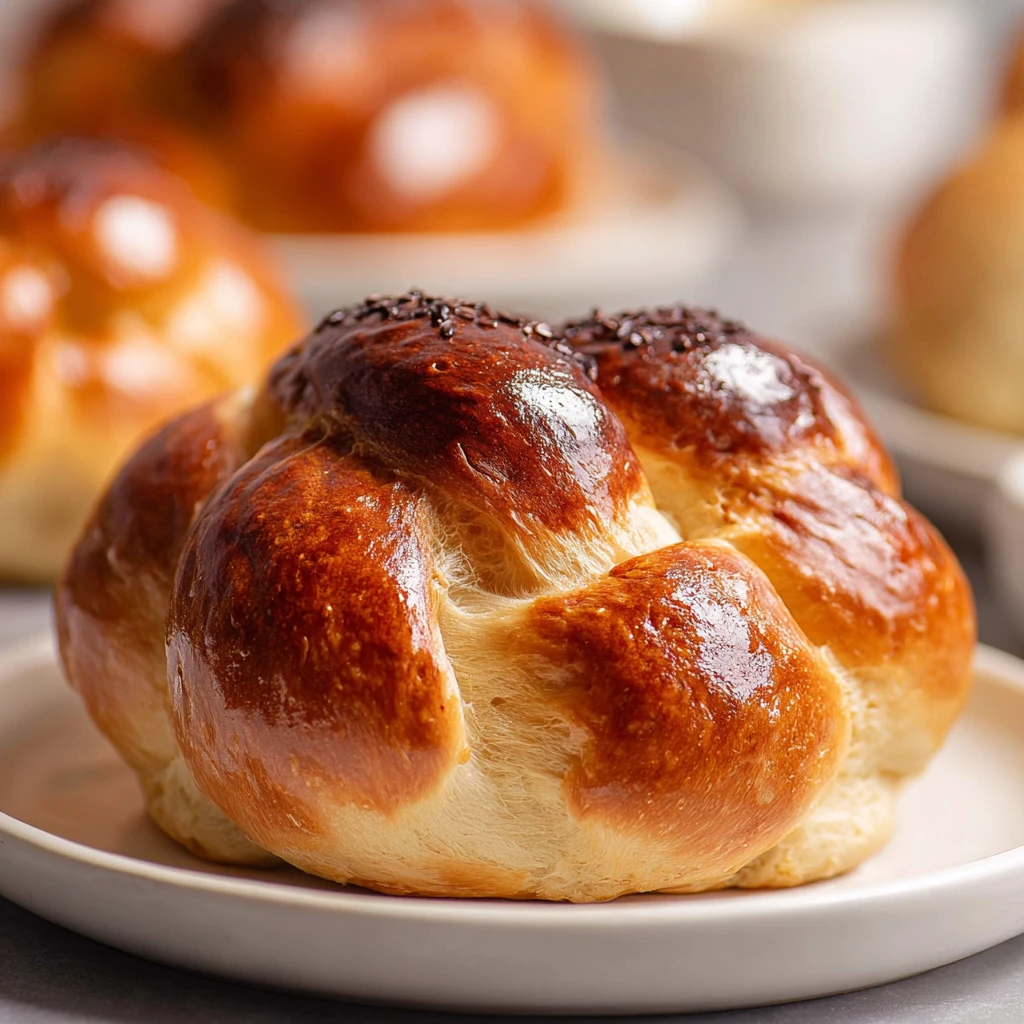
Imagine the aroma of freshly baked bread wafting through your home, evoking feelings of warmth and comfort. One particular bread variety that embodies tradition, flavor, and a touch of sweetness is Challah Rolls. Originating from Jewish culture, these soft and pillowy rolls are not only a delight to the taste buds but also carry a rich history of significance. In this recipe journey, we will explore the art of making Challah Rolls from scratch, uncovering the secrets to achieving that perfect balance of texture and taste.
Why You’ll Love This Recipe
What sets Challah Rolls apart is their unique combination of a soft interior and a slightly crisp crust, making them versatile for various culinary creations. These rolls are perfect for sandwiches, toast, or simply enjoying on their own. Their subtly sweet flavor profile adds a delightful twist to your everyday bread options. Additionally, Challah Rolls can be adapted to suit different dietary preferences, allowing everyone to savor their irresistible goodness.
With simple ingredients and easy-to-follow steps, this recipe is a gateway to homemade bread-making success. Whether you are a seasoned baker or a novice in the kitchen, the joy of baking and savoring these Challah Rolls knows no bounds.
Ingredients
For this recipe, you will need the following ingredients:
– All-purpose flour
– Yeast
– Sugar
– Salt
– Eggs
– Oil
– Water
Optional substitutions include using honey instead of sugar for a different flavor profile or incorporating whole wheat flour for a nuttier taste. These variations can add a personal touch to your Challah Rolls, catering to individual preferences.
Step-by-Step Instructions
1. Begin by activating the yeast in warm water with a pinch of sugar. Let it sit until foamy.
2. In a mixing bowl, combine the flour, salt, sugar, eggs, oil, and the yeast mixture. Knead the dough until smooth.
3. Allow the dough to rise in a warm place until doubled in size.
4. Divide the dough into equal portions and shape them into rolls. Let them rise again until puffy.
5. Brush the rolls with an egg wash and bake until golden brown.
6. Enjoy the freshly baked Challah Rolls warm or at room temperature.
Pro tip: For an extra shiny finish, brush the rolls with honey right after they come out of the oven.
Expert Tips for Success
To ensure your Challah Rolls turn out perfectly every time, consider the following tips:
– Use room temperature ingredients for even dough consistency.
– Allow enough time for the dough to rise, as this contributes to the rolls’ softness.
– Experiment with different braiding techniques for a visually appealing presentation.
Avoid overworking the dough, as this can result in tough rolls.
Variations and Substitutions
For a creative twist, you can customize your Challah Rolls by:
– Adding dried fruits or nuts to the dough for a flavorful surprise.
– Mixing in herbs like rosemary or thyme for a savory option.
– Swapping out part of the flour for mashed sweet potatoes for a unique texture and taste.
Feel free to unleash your culinary creativity and tailor these rolls to suit your preferences or the occasion.
Serving Suggestions
To elevate your Challah Rolls experience, consider serving them:
– Sliced and toasted with butter and jam for a delightful breakfast treat.
– As a side to a hearty soup or stew, soaking up the flavors with each bite.
– Paired with a selection of cheeses and fruits for a charming picnic or brunch spread.
These rolls are incredibly versatile and can complement both sweet and savory accompaniments, making them a crowd-pleaser at any meal.
FAQs
Q: Can I freeze the dough to bake later?
A: Yes, you can shape the rolls and freeze them before the final rise. When ready to bake, simply thaw and let them rise before baking.
Q: How long will Challah Rolls stay fresh?
A: Store the rolls in an airtight container or bag at room temperature for up to 2-3 days. You can also freeze them for longer shelf life.
Q: Can I make mini Challah Rolls for appetizers?
A: Absolutely! Simply divide the dough into smaller portions and adjust the baking time accordingly for bite-sized delights.
Final Thoughts
Embark on your Challah Rolls baking adventure with confidence, knowing that each step brings you closer to a rewarding and delicious outcome. The process of creating these rolls is not just about the end result but also about the journey of discovery and enjoyment along the way.
So, gather your ingredients, preheat your oven, and let the magic of Challah Rolls fill your kitchen with love and warmth. Share these delectable rolls with your loved ones, creating cherished moments around the table that celebrate the joy of homemade bread and the traditions it carries.
Challah Rolls
Soft and pillowy rolls with a slightly sweet flavor, perfect for sandwiches, toast, or enjoying on their own. This recipe provides step-by-step instructions to create these versatile and delicious bread rolls from scratch.
Ingredients
- 3 1/2 cups all-purpose flour
- 2 1/4 tsp yeast
- 1/4 cup sugar
- 1 tsp salt
- 2 eggs
- 1/4 cup oil
- 1 cup warm water
Directions
- Begin by activating the yeast in warm water with a pinch of sugar. Let it sit until foamy.
- In a mixing bowl, combine the flour, salt, sugar, eggs, oil, and the yeast mixture. Knead the dough until smooth.
- Allow the dough to rise in a warm place until doubled in size.
- Divide the dough into equal portions and shape them into rolls. Let them rise again until puffy.
- Brush the rolls with an egg wash and bake until golden brown.
- Enjoy the freshly baked Challah Rolls warm or at room temperature. For an extra shiny finish, brush the rolls with honey right after they come out of the oven.