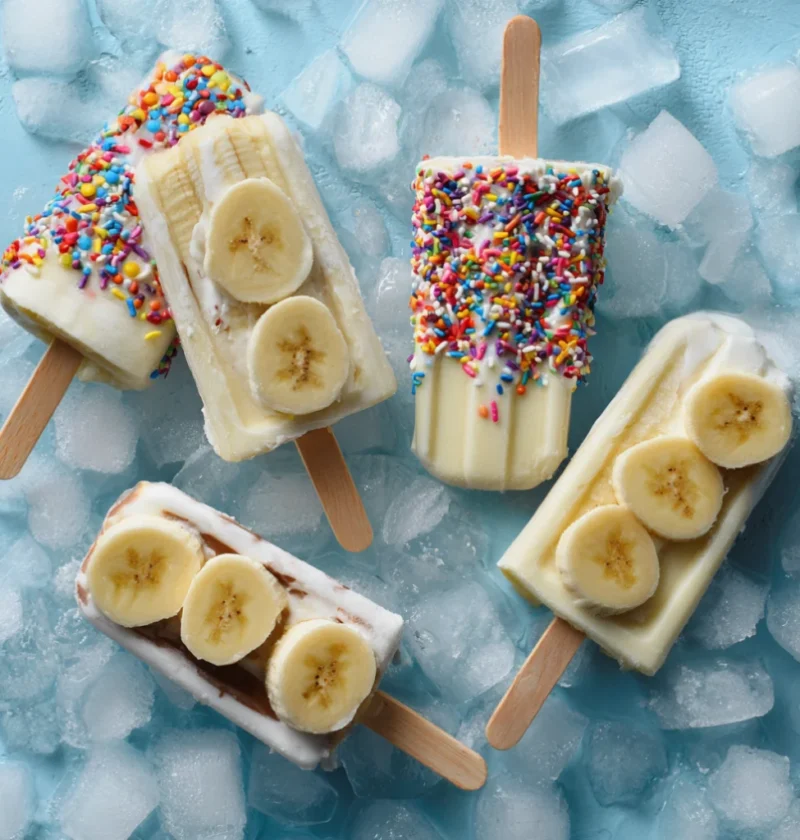
Looking for a delicious and nutritious treat to beat the summer heat? These Healthy Frozen Banana Pops are not only easy to make but also a delightful way to enjoy fruit in a fun and creative form. Perfect for kids and adults alike, these banana pops provide a guilt-free dessert option that packs flavor and nutrition. Bananas are rich in potassium, vitamin C, and dietary fiber, making them an excellent choice for a healthy snack. Additionally, the yogurt dip not only adds creaminess but also enhances the nutritional profile by providing probiotics, which are beneficial for gut health. Plus, by adding a layer of yogurt or chocolate, you can elevate their taste while keeping them low in calories. Whether you’re cooling off after a workout or treating yourself on a warm afternoon, these pops will satisfy your sweet tooth while being good for you.
Table of Contents
Ingredients
- Base Ingredients:
- 2 ripe bananas (the riper the bananas, the sweeter your pops will be, so aim for ones with a few brown spots)
- Yogurt Dip:
- 1 cup plain Greek yogurt (or dairy-free yogurt for a vegan option; coconut yogurt adds a nice flavor)
- 2 tablespoons honey or maple syrup (adjust according to taste; use more for sweeter pops or omit for a sugar-free version)
- Chocolate Coating (optional):
- 1 cup dark chocolate chips (or vegan chocolate chips; look for chocolate with at least 70% cocoa for health benefits)
- 1 tablespoon coconut oil (to help smooth the chocolate; it also adds a hint of coconut flavor)
- Toppings (optional):
- Chopped nuts (almonds, peanuts, walnuts; they add crunch and healthy fats)
- Shredded coconut (unsweetened for a healthier option)
- Sprinkles (for a fun, festive touch)
Steps / Instructions
- Start by peeling the ripe bananas and cut them in half crosswise. Insert wooden popsicle sticks into the cut end of each banana half, creating a handle. Ensure the sticks are inserted deep enough to hold the banana securely while dipping.
- In a bowl, mix the plain Greek yogurt with honey or maple syrup until well combined. Taste and adjust sweetness if necessary; remember, the mixture should be sweet enough to enhance the bananas without overpowering their natural flavor.
- Dip each banana half into the yogurt mixture, ensuring they are fully coated. Place the yogurt-dipped bananas on a parchment-lined baking sheet to prevent sticking.
- For added indulgence, melt the dark chocolate chips and coconut oil together in a microwave-safe bowl. Heat in 30-second intervals, stirring in between, until smooth and glossy. This step is crucial to avoid burning the chocolate, which can ruin its texture.
- If using chocolate, dip the yogurt-coated banana pops into the melted chocolate, allowing any excess to drip off. Return them to the parchment-lined sheet, making sure they are evenly coated.
- Sprinkle your choice of toppings over the chocolate-dipped bananas before the chocolate hardens. This makes it easier for the toppings to adhere to the chocolate layer.
- Once all banana pops are prepared, place the baking sheet in the freezer for at least 2 hours or until fully frozen. This step is essential for achieving the perfect texture; they should be solid enough to enjoy without melting immediately.
- When ready to serve, remove the banana pops from the freezer and enjoy immediately. Store any leftovers in an airtight container in the freezer for a refreshing snack anytime.
Tips & Tricks
- For a smoother yogurt coating, blend the yogurt with a splash of milk before dipping. This helps the yogurt spread more evenly and creates a beautiful finish.
- If you have leftovers, simply place the banana pops in a freezer-safe bag or container. They can last up to a month in the freezer, retaining their texture and flavor. Ensure they are well-wrapped to prevent freezer burn.
- To prevent the chocolate from cracking when bitten, let the banana pops sit at room temperature for a few minutes before serving. This small step makes a big difference when enjoying your treats.
- Feel free to use different types of yogurt or even flavored ones for various tastes; for example, vanilla or strawberry yogurt can add a delightful twist.
- If you’re worried about mess, place a cupcake liner at the bottom of the popsicle stick to catch any drips. This also adds a festive touch when serving.
Variations
There are endless ways to customize your Healthy Frozen Banana Pops. Here are some ideas: You can learn more about this topic. These variations will keep your pops exciting and encourage you to experiment with different flavors.
- Use different types of yogurt—try coconut or almond yogurt for a tropical flair. Each yogurt type brings its unique texture and taste.
- Add a sprinkle of cinnamon or vanilla extract to the yogurt for an extra flavor boost. This simple addition can elevate the overall taste profile.
- Swap out bananas for other fruits like strawberries, peaches, or kiwi for a colorful mix of frozen fruit pops. Utilizing seasonal fruits can enhance freshness and flavor.
Serving Suggestions
These banana pops make a great addition to any summer gathering. Serve them on a platter with fresh fruit or alongside a refreshing smoothie. They can also pair nicely with a drizzle of homemade raspberry sauce for a burst of flavor. Get creative with your presentation by securing them in a cup filled with ice to keep them cool while serving. This not only looks appealing but also ensures your treats stay frozen longer. Check out our related guide for more tips to enhance your serving experience.
FAQ
- Can I make these banana pops in advance? Yes, they are perfect for meal prep! Just store them in an airtight container in the freezer for up to a month, making them a convenient snack option.
- Are they suitable for vegans? Absolutely! Just use a plant-based yogurt and vegan chocolate to keep them dairy-free. This way, everyone can enjoy this delicious treat without dietary restrictions.
Experience the joy of creating Healthy Frozen Banana Pops and share them with friends and family. They offer a nutritious twist on traditional desserts and are bound to be a hit on hot summer days! Enjoy experimenting with different flavors and topping combinations to make them your own!
Healthy Frozen Banana Pops
Looking for a delicious and nutritious treat to beat the summer heat? These Healthy Frozen Banana Pops are not only easy to make but also a delightful way to enjoy fruit in a fun and creative form. Perfect for kids and adults alike, these banana pops provide a guilt-free dessert option that packs flavor and nutrition.
Ingredients
- 2 ripe bananas
- 1 cup plain Greek yogurt (or dairy-free yogurt for a vegan option; coconut yogurt adds a nice flavor)
- 2 tablespoons honey or maple syrup (adjust according to taste)
- 1 cup dark chocolate chips (or vegan chocolate chips)
- 1 tablespoon coconut oil
- Chopped nuts (almonds, peanuts, walnuts)
- Shredded coconut (unsweetened)
- Sprinkles
Directions
Start by peeling the ripe bananas and cut them in half crosswise. Insert wooden popsicle sticks into the cut end of each banana half.
In a bowl, mix the plain Greek yogurt with honey or maple syrup until well combined.
Dip each banana half into the yogurt mixture, ensuring they are fully coated. Place the yogurt-dipped bananas on a parchment-lined baking sheet.
Melt the dark chocolate chips and coconut oil together in a microwave-safe bowl.
Dip the yogurt-coated banana pops into the melted chocolate, allowing any excess to drip off. Return them to the parchment-lined sheet.
Sprinkle your choice of toppings over the chocolate-dipped bananas before the chocolate hardens.
Once all banana pops are prepared, place the baking sheet in the freezer for at least 2 hours or until fully frozen.
When ready to serve, remove the banana pops from the freezer and enjoy immediately.
Recipe Reviews
- ★★★★★
Excellent recipe!
Leave a Reply
Your email address will not be published. Required fields are marked *
Excellent recipe!