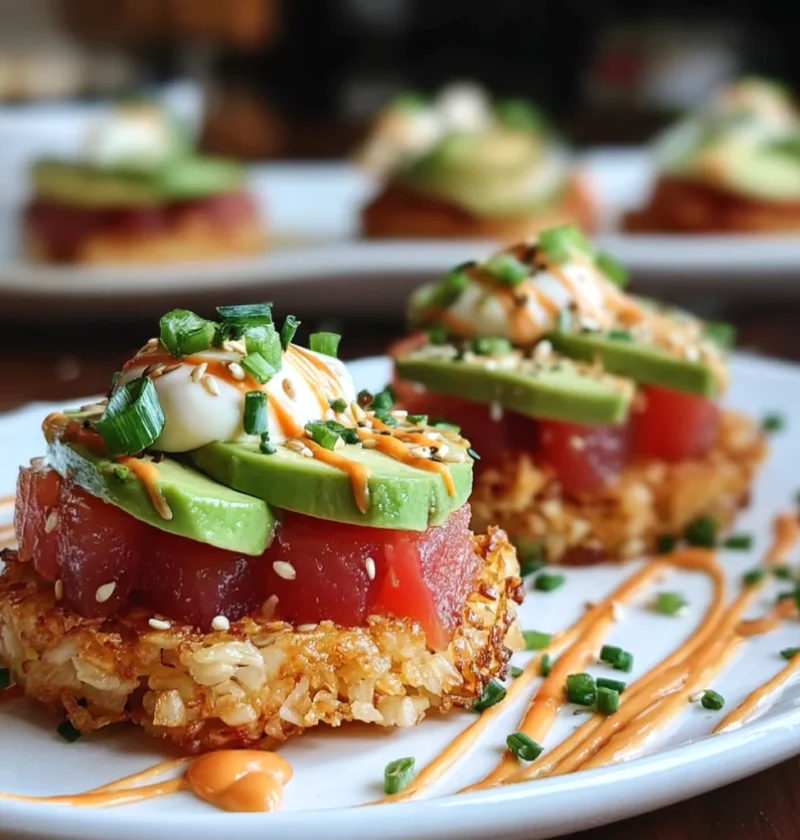
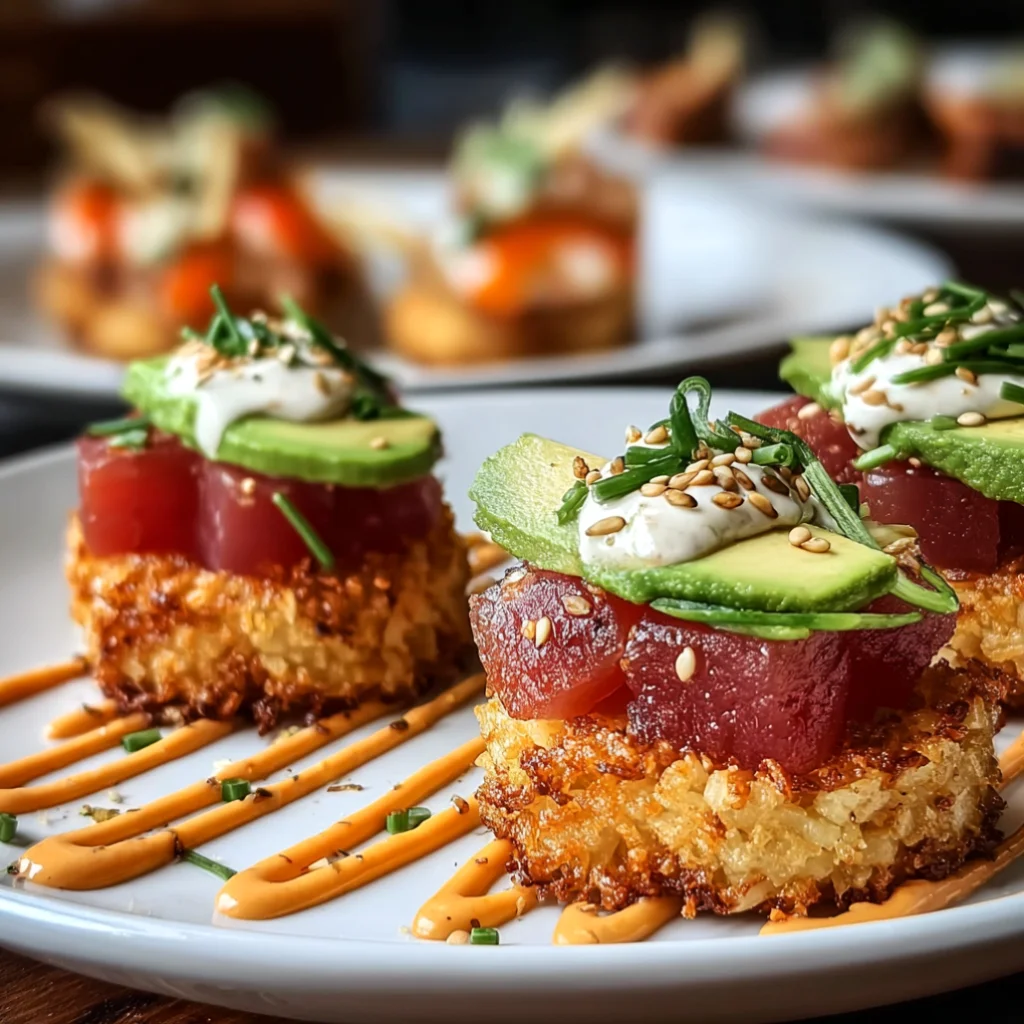
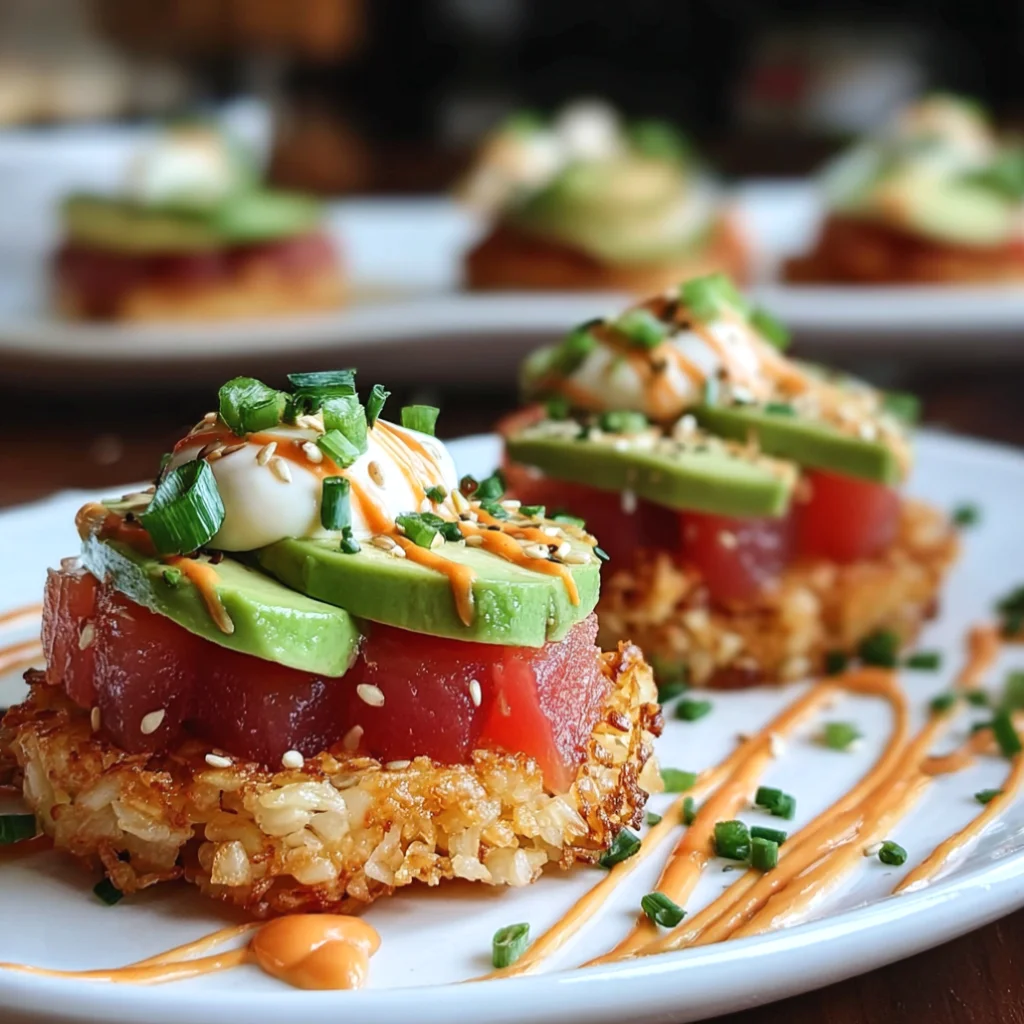
Are you ready to impress your guests with a stunning appetizer that combines the freshness of sushi with a delightful crunch? Introducing Spicy Tuna Crispy Rice, a sensational appetizer that is sure to become your new favorite. This dish beautifully marries the rich flavors of seared tuna with the textural contrast of crispy rice, topped with a creamy spicy mayo sauce. Originating from Japanese cuisine, this dish has swiftly made its way into modern Asian fusion restaurants, captivating food lovers everywhere. The combination of the fresh tuna and the crispy, warm rice creates a dish that is both appealing to the eyes and tantalizing to the palate. Whether you’re hosting a gathering or simply looking for a flavorful snack, this recipe will elevate any occasion. Perfect for parties, this dish is often served as a shareable plate, encouraging conversation and delightful tasting experiences.
Ingredients
To create the perfect Spicy Tuna Crispy Rice, gather the following ingredients: You can learn more about this topic.
- For the Crispy Rice:
- 2 cups sushi rice
- 2 ½ cups water
- 1 tablespoon rice vinegar
- 1 tablespoon sugar
- ½ teaspoon salt
- Vegetable oil (for frying), preferably a high smoke point oil like canola or grapeseed
- For the Spicy Tuna:
- 8 ounces sushi-grade tuna, diced into small, bite-sized pieces (ensure it’s fresh and of high quality)
- 2 tablespoons mayonnaise (preferably Japanese mayo for a creamier texture, such as Kewpie)
- 1 tablespoon sriracha sauce, or adjust to taste for desired heat, adding more for those who love spice
- 1 teaspoon sesame oil, which adds a rich nuttiness and enhances the overall flavor profile
- 1 green onion, finely chopped for a fresh crunch and vibrant color
- Salt, to taste for enhancing flavor; consider using sea salt for a gourmet touch
- For Garnishing:
- Sesame seeds, toasted if possible for added flavor and visual appeal
- Chopped green onions, to add a pop of color and freshness
- Pickled ginger (optional, for a refreshing palate cleanser that balances the richness)
- Nori strips (optional, for an authentic touch and an extra layer of taste)
For the best flavor, use high-quality sushi-grade tuna. If you can’t find it locally, consider ordering from reputable seafood suppliers or checking your local fishmonger. Freshness is key in this dish, so ensure your ingredients are as fresh as possible. Always check for the fish’s bright color and firm texture. Check out our related guide for more tips on sourcing quality seafood and ensuring food safety.
Steps / Instructions
- Prepare the Sushi Rice: Rinse the sushi rice under cold water until the water runs clear. This step removes excess starch and prevents the rice from becoming gummy, ensuring each grain remains distinct and chewy. Rinsing helps achieve that perfect sushi rice texture, vital for the crispy rice base.
- Cook the Rice: In a rice cooker or saucepan, combine the rinsed rice and water. Cook according to the rice cooker instructions or bring to a boil, then cover and simmer on low heat for about 18-20 minutes until the water is absorbed. Make sure not to lift the lid during cooking to maintain steam; this is crucial for cooking the rice evenly and thoroughly.
- Season the Rice: In a small bowl, mix the rice vinegar, sugar, and salt until dissolved. Once the rice is cooked, fluff it with a fork and gently fold in the vinegar mixture. Allow it to cool to room temperature, as this helps the rice firm up for shaping. This step is essential for achieving the right consistency for frying.
- Shape the Rice: Once cooled, wet your hands to prevent sticking. Scoop about 2 tablespoons of rice and form it into a small rectangular shape (about 2 inches long), pressing gently to keep it together but not too tightly. Repeat until all the rice is shaped. Aim for uniformity in size to ensure even frying, which guarantees that each piece cooks perfectly.
- Fry the Rice: In a large skillet, heat vegetable oil over medium-high heat. Carefully add the shaped rice pieces and fry for 2-3 minutes on each side or until golden brown and crispy. Remove and drain on paper towels, ensuring they retain their crunch. A good indicator of doneness is a beautiful golden color; be sure to monitor closely to avoid burning.
- Prepare the Spicy Tuna: In a bowl, combine the diced tuna, mayonnaise, sriracha, sesame oil, green onion, and salt. Mix gently to combine, ensuring the tuna is well-coated without mashing it. This mixture should be vibrant and creamy, with a hint of heat from the sriracha, giving it a beautiful color and texture that invites you to dig in.
- Assemble the Appetizer: Top each crispy rice piece with a generous spoonful of the spicy tuna mixture. Ensure each piece is well-covered for optimal flavor in every bite, allowing the creamy tuna to meld beautifully with the crispy base.
- Garnish: Sprinkle sesame seeds and chopped green onions on top of the tuna. Optionally, serve with pickled ginger and nori strips for extra flavor and presentation. A drizzle of extra sriracha can also add a nice touch for those who prefer more heat.
Tips & Tricks
To ensure perfect Spicy Tuna Crispy Rice, keep these tips in mind:
- Frying Technique: Make sure the oil is hot enough before adding the rice to achieve that desired crispiness. You can test the oil by dropping a small piece of rice; it should sizzle immediately. Too cool oil will make the rice soggy and not achieve the perfect crunchy texture.
- Make Ahead: You can prepare the rice a day in advance and store it in the refrigerator. Just reheat it in a hot pan for a few minutes before frying. This can save you time if you’re entertaining, allowing you to focus on other aspects of your meal.
- Storage: Leftover spicy tuna can be stored in an airtight container in the refrigerator for up to 2 days. However, it’s best enjoyed fresh for the best texture and flavor. The crispy rice will lose its crunch if stored, so consider frying only the amount needed for serving.
- Common Mistakes: Avoid overcooking the rice, as it can become mushy. Ensure you use sushi rice for the best texture, as long-grain rice will not replicate the authentic sticky consistency needed for this dish. Also, avoid overcrowding the pan while frying, as this can lower the oil temperature and result in uneven crisping.
Conclusion
Now that you have mastered the art of making Spicy Tuna Crispy Rice, you can delight your family and friends with this exquisite appetizer. Its combination of flavors and textures will surely leave everyone wanting more. Enjoy the process, and don’t hesitate to get creative with your toppings and garnishes! Share your experiences or any modifications you make to the recipe for a personalized touch that reflects your culinary style.
Spicy Tuna Crispy Rice
A sensational appetizer that combines the freshness of sushi with a delightful crunch, featuring seared tuna with crispy rice and a creamy spicy mayo sauce.
Ingredients
- 2 cups sushi rice
- 2 ½ cups water
- 1 tablespoon rice vinegar
- 1 tablespoon sugar
- ½ teaspoon salt
- Vegetable oil (for frying)
- 8 ounces sushi-grade tuna, diced
- 2 tablespoons mayonnaise
- 1 tablespoon sriracha sauce
- 1 teaspoon sesame oil
- 1 green onion, finely chopped
- Salt, to taste
- Sesame seeds, toasted
- Chopped green onions
- Pickled ginger (optional)
- Nori strips (optional)
Directions
Rinse the sushi rice under cold water until the water runs clear to remove excess starch.
Cook the rinsed rice with water in a rice cooker or saucepan according to instructions, about 18-20 minutes.
Mix rice vinegar, sugar, and salt in a small bowl until dissolved, then fold into the cooked rice and let it cool.
Wet your hands and scoop 2 tablespoons of the cooled rice to form small rectangular shapes.
Fry the shaped rice pieces in hot vegetable oil for 2-3 minutes on each side until golden brown and crispy.
Combine diced tuna, mayonnaise, sriracha, sesame oil, green onion, and salt in a bowl; mix gently.
Top each crispy rice piece with a spoonful of the spicy tuna mixture.
Garnish with sesame seeds and chopped green onions, and serve with pickled ginger and nori strips if desired.
Nutrition Facts
Recipe Reviews
- ★★★★★
Excellent recipe!
Leave a Reply
Your email address will not be published. Required fields are marked *


Excellent recipe!