Introduction
Welcome to the world of homemade snacks with a twist! Today, we’re diving into the delectable realm of chickpea chips – a crunchy, flavorful, and nutritious treat that’s perfect for all ages. Whether you’re looking for a wholesome snack for your kids or a guilt-free indulgence for yourself, this easy chickpea chips recipe is sure to become a household favorite.
Imagine the satisfaction of munching on crispy chickpea chips that you made from scratch, knowing exactly what goes into them. Say goodbye to store-bought snacks loaded with preservatives and hello to a healthier snacking option that you can customize to your liking. Let’s embark on a culinary adventure and learn how to make chickpea chips at home!
Chickpea chips have a rich history, dating back to ancient civilizations where chickpeas were revered for their nutritional benefits. Today, we’re putting a modern twist on this classic ingredient, creating a snack that’s not only delicious but also gluten-free, vegan, and packed with protein. Get ready to tantalize your taste buds with our crispy chickpea chips DIY guide!
Join us as we explore the art of making homemade chickpea chips and discover why this recipe is more than just a snack – it’s a culinary experience that brings families together in the kitchen and around the table.
Why You’ll Love This Recipe
Our homemade chickpea chips for kids recipe is a game-changer in the world of snacking. Here’s why you’ll fall in love with this crunchy delight:
1. Easy to make: With simple ingredients and basic kitchen tools, you can whip up a batch of crispy chickpea chips in no time.
2. Healthy and nutritious: Chickpeas are a powerhouse of nutrients, offering fiber, protein, and essential vitamins and minerals.
3. Customizable: From mild seasonings to bold spices, you can tailor your chickpea chips to suit your taste preferences.
4. Family-friendly: Get the kids involved in the kitchen and have fun making a wholesome snack together.
5. Versatile: Enjoy these gluten-free chickpea snack recipes as a standalone treat, a crunchy salad topper, or a side dish for your favorite meals.
Now, let’s gather our ingredients and embark on a flavorful journey to create the best chickpea chips recipe online!
Ingredients
For this simple chickpea chips recipe, you’ll need the following ingredients:
– Canned chickpeas (garbanzo beans)
– Olive oil
– Seasonings of your choice (such as paprika, garlic powder, cumin, or chili powder)
– Salt and pepper
Feel free to experiment with different seasoning combinations to create your unique chickpea chips flavor profile. For a low-calorie option, you can skip the oil and opt for a no-oil recipe that still delivers a satisfying crunch.
Step-by-Step Instructions
Let’s dive into the step-by-step guide on how to make chickpea chips at home:
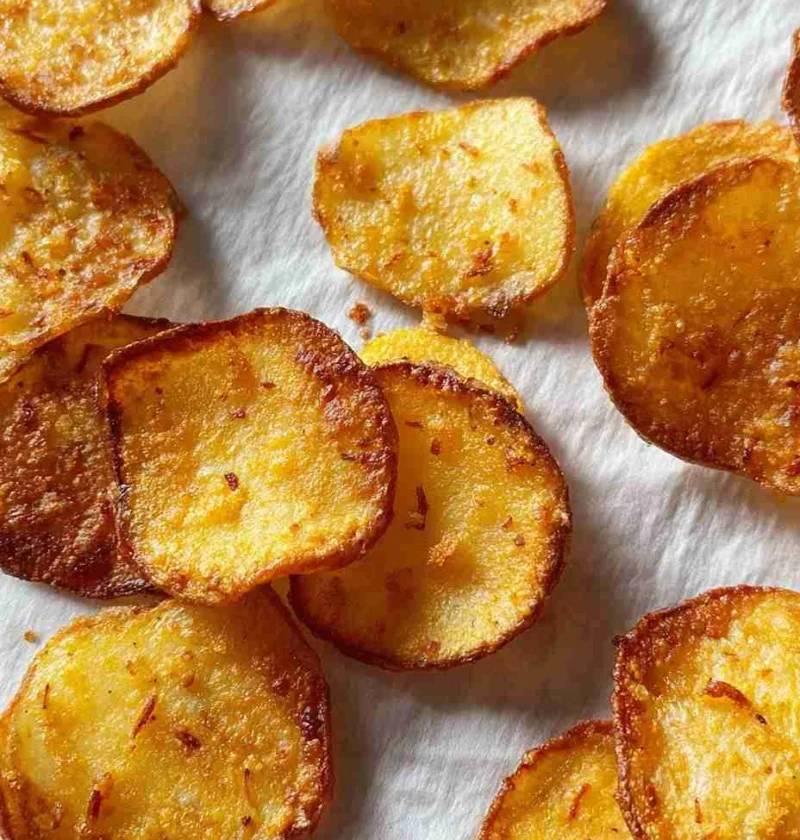
1. Drain and Rinse the Chickpeas
Start by draining and rinsing the canned chickpeas to remove excess sodium. Pat them dry with a paper towel to ensure crispiness during baking.
2. Season the Chickpeas
In a bowl, toss the chickpeas with olive oil, your choice of seasonings, salt, and pepper until evenly coated. Ensure each chickpea is well seasoned for maximum flavor.
3. Spread on a Baking Sheet
Spread the seasoned chickpeas in a single layer on a baking sheet lined with parchment paper. This allows the chickpeas to roast evenly and become crispy.
4. Bake to Perfection
Preheat your oven and bake the chickpeas until they are golden brown and crispy. Keep a close eye on them to prevent burning.
5. Cool and Enjoy
Once baked, let the chickpea chips cool slightly before indulging in their crunchy goodness. Serve them as a standalone snack or pair them with your favorite dipping sauces.
With these simple steps, you’ll master the art of making chickpea chips that are both delicious and nutritious. Let’s move on to some expert tips to ensure your chickpea chips turn out perfectly every time!
Expert Tips for Success
1. Dry the chickpeas thoroughly before seasoning to achieve a crispy texture.
2. Experiment with different spice blends to create unique flavor profiles.
3. For extra crunch, roast the chickpeas in an air fryer using our chickpea chips air fryer recipe.
4. Store any leftover chickpea chips in an airtight container to maintain their crispiness.
By following these expert tips, you’ll elevate your chickpea chips game and impress your family and friends with your culinary skills. Now, let’s explore some creative variations and substitutions to make this recipe your own!
Variations and Substitutions
Looking to switch things up? Here are some creative ways to customize your chickpea chips:
1. Sweet and Spicy
Add a touch of honey and cayenne pepper for a sweet and spicy kick.
2. Herbed Parmesan
Sprinkle grated Parmesan cheese and dried herbs like rosemary or thyme for a gourmet twist.
3. Curry Coconut
Coat the chickpeas in curry powder and coconut flakes for a tropical flavor explosion.
4. Zesty Lemon Pepper
Zest a lemon and mix it with black pepper for a tangy and refreshing option.
Feel free to get creative with your seasonings and toppings to make your chickpea chips truly unique. Now, let’s explore some serving suggestions to elevate your snacking experience!
Serving Suggestions
Pair your homemade chickpea chips with the following for a delightful snacking experience:
– Freshly made guacamole
– Creamy hummus dip
– Spicy salsa
– Tangy tzatziki sauce
These dips complement the flavors of the chickpea chips and take your snacking to the next level. Whether you’re hosting a party or enjoying a quiet evening at home, these combinations are sure to please your palate.
FAQs
Q: Can I use dried chickpeas instead of canned?
A: Yes, you can. Simply soak and cook the dried chickpeas before seasoning and baking them for this recipe.
Q: How long do chickpea chips stay fresh?
A: When stored in an airtight container, chickpea chips can stay fresh for up to a week.
Q: Can I reduce the salt content in this recipe?
A: Absolutely! Adjust the salt according to your taste preferences or opt for salt-free seasonings.
Q: Are chickpea chips suitable for a gluten-free diet?
A: Yes, chickpea chips are naturally gluten-free, making them a safe snack option for individuals with gluten sensitivities.
Final Thoughts
As you embark on your chickpea chips cooking journey, remember that creativity is your best friend in the kitchen. Experiment with different seasonings, try new dipping sauces, and involve your loved ones in the cooking process. These crunchy chickpea chips are not just a snack – they’re a testament to the joy of homemade goodness.
We hope this guide has inspired you to explore the world of nutritious and flavorful snacking with our easy chickpea chips recipe. Gather your ingredients, preheat your oven, and let the aroma of roasted chickpeas fill your kitchen. Here’s to happy snacking and memorable moments shared over a bowl of homemade chickpea chips!
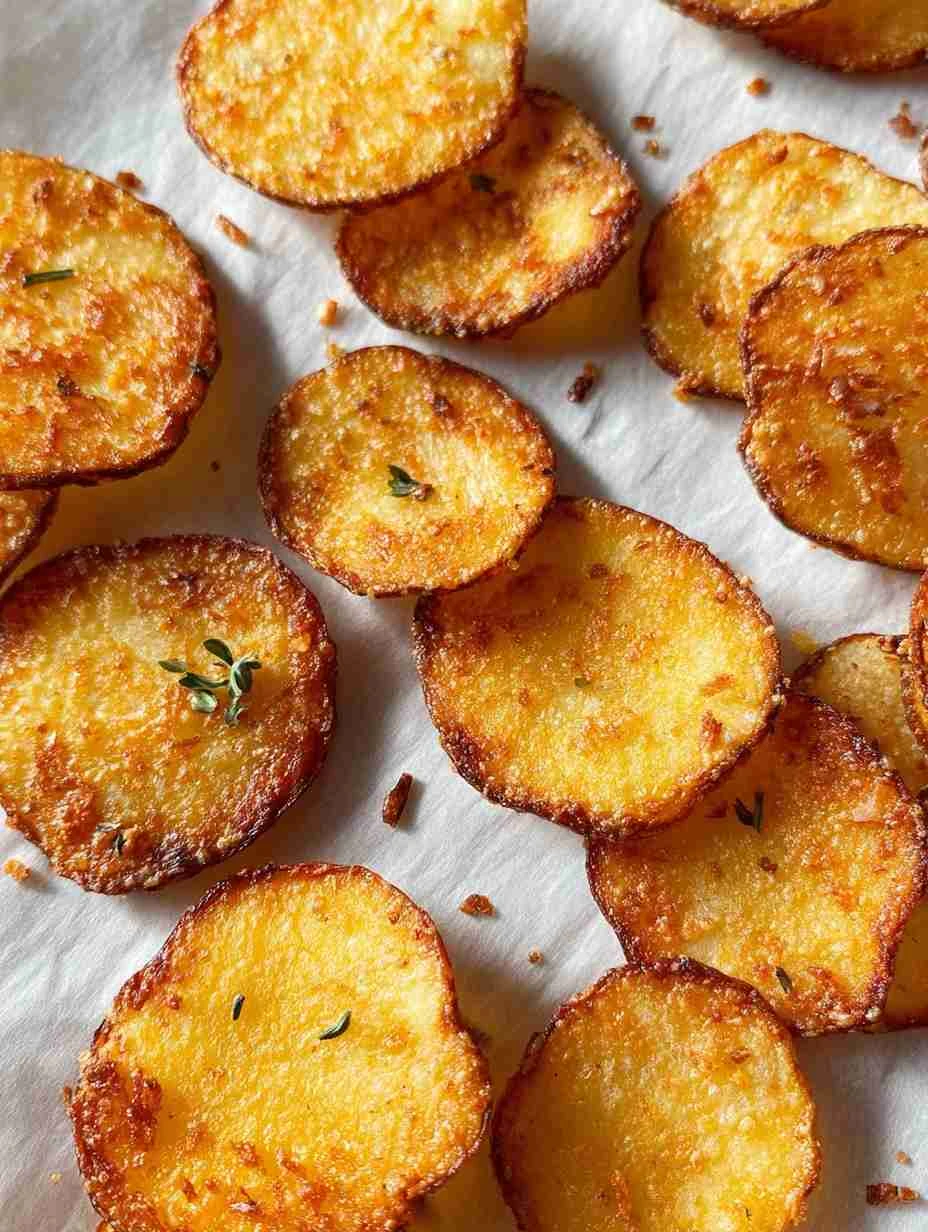
Chickpea Chips Recipe for Easy, Crunchy, Family Friendly Snacking
Enjoy a crunchy, flavorful, and nutritious snack with these homemade chickpea chips. Made from scratch using simple ingredients, these crispy chips are perfect for all ages and occasions. Say goodbye to store-bought snacks and hello to a healthier, customizable option that will become a household favorite.
Ingredients
- 1 can of chickpeas (garbanzo beans)
- 2 tablespoons olive oil
- Seasonings of your choice (such as paprika, garlic powder, cumin, or chili powder)
- Salt and pepper
Directions
- Drain and rinse the canned chickpeas to remove excess sodium. Pat them dry with a paper towel.
- In a bowl, toss the chickpeas with olive oil, your choice of seasonings, salt, and pepper until evenly coated.
- Spread the seasoned chickpeas in a single layer on a baking sheet lined with parchment paper.
- Preheat your oven and bake the chickpeas until golden brown and crispy. Watch carefully to prevent burning.
- Let the chickpea chips cool slightly before serving. Enjoy as a standalone snack or with dipping sauces.